How to Grow Microgreens: A Step-by-Step Guide

Get ready to transform your home into a vibrant microgreen wonderland! Growing microgreens is not just about gardening; it’s a thrilling adventure into crafting a powerhouse of nutrition within your own four walls. Join us as we dive into the enchanting world of microgreens, unravelling the secrets step by step and addressing all the juicy questions buzzing in your green-thumb mind. Let the microgreen magic begin – your nutrient-rich mini garden awaits!
Choosing Your Microgreens:
Deciding what microgreens to grow is like picking the stars for your tiny garden show. It’s all about what you like and want to see sprouting up. Whether you fancy a vibrant arugula, want to add a healthy twist with chia, or opt for nutrient-packed broccoli, the decision is yours.
Simple Steps:
- Pick What You Love: Choose microgreens that make your taste buds dance. It could be the peppery arugula kick, the chia health boost, or the goodness-packed broccoli.
- Quality Seeds Matter: Think of seeds as the magic beans that make your microgreen garden thrive. Get good-quality seeds to set the stage for a successful growing journey.
How to Grow Microgreens in Soil 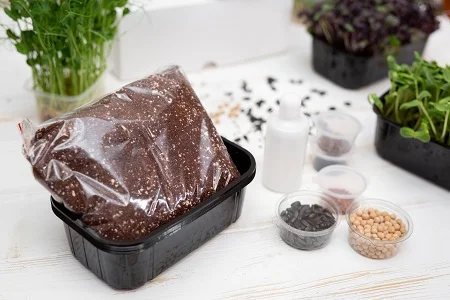
Now that you’ve picked your favourite micro greens, let’s discuss their cosy homes. You have two options: the classic way with soil or the modern twist with hydroponics. Don’t worry; we’re here to make it simple!
Easy Choices:
- Traditional Soil: If you’re feeling a bit old-school (in a good way!), go for soil. It’s like planting your microgreens in their natural comfy bed. We’ll show you how it’s easy-peasy and perfect for any space.
- Hydroponics Adventure: Fancy a more space-efficient and high-tech approach? Hydroponics is the way to go! It’s like giving your microgreens an excellent hydro spa treatment. We’ll significantly guide you through this method’s simplicity and efficiency if you’re growing microgreens indoors.
How to Grow Microgreens without Soil 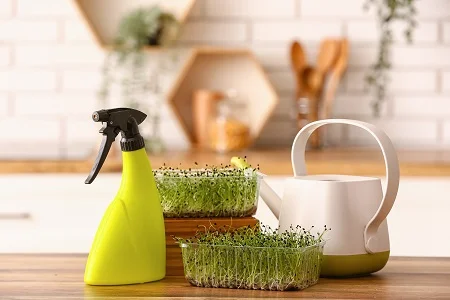
Growing microgreens without soil is a straightforward and mess-free alternative, perfect for indoor gardening. Here’s a simple guide on how to grow microgreens without soil:
Materials Needed:
- Shallow Tray or Container: To provide a flat surface for your microgreens.
- Spray Bottle: For watering.
- Paper Towels or Growing Medium: To support the microgreen roots.
Step-by-Step Guide:
- Choose Your Microgreens:Select the microgreens you want to grow. Popular choices for soil-free growing include mustard, sunflower, and arugula.
- Prepare the Tray:Place a layer of dampened paper towels or another soilless growing medium in the shallow tray. Make sure it’s evenly spread and covers the entire surface.
- Spread the Seeds:Sprinkle the microgreen seeds evenly across the surface of the paper towels or growing medium. Press them down slightly to ensure good contact.
- Watering:Use a spray bottle to mist the seeds gently. Keep the paper towels consistently moist, but avoid waterlogging.
- Cover and Wait:Cover the tray with another layer of paper towels or a plastic lid to create a mini greenhouse effect. Place it in a warm, well-lit area but away from direct sunlight.
- Germination:Within a few days, you’ll see the seeds germinating. Once they’ve sprouted, remove the cover and place the tray in a well-lit area, preferably with indirect sunlight.
- Watering Routine:Continue misting the microgreens regularly to keep the growing medium moist. Be gentle to avoid disturbing the delicate roots.
- Harvesting:In about 7-14 days, depending on the type of microgreen, they’ll be ready for harvest. Use clean scissors to cut the microgreens just above the growing medium.
Tips:
- Choose a soilless growing medium designed explicitly for microgreens.
- Maintain consistent moisture to support healthy growth.
- Keep an eye on the light – microgreens need good light, but direct sunlight might be too intense.
How to Grow Microgreens Indoors 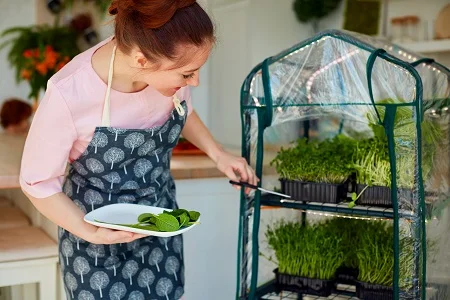
Growing microgreens indoors is the perfect solution if your living space is a bit cosy. No need to worry – we’ve covered you with simple steps to turn any space into a thriving microgreen paradise!
Easy Steps:
- Find Your Spot:Look for a spot with good natural light. Windowsills are fantastic, but if direct sunlight is limited, worry not! We’ll explore creative solutions to make the most of your indoor space.
- Choose Your Containers:You don’t need a fancy garden – any shallow container will do. Pick what suits your style and space, whether it’s a tray, a recycled dish, or even a small pot.
- Spread the Seeds:Sprinkle your chosen microgreen seeds evenly over the growing medium in your container. Give them a gentle press to ensure they make good contact.
- Watering Routine:Use a spray bottle to water your seeds. Keep them moist but not soggy. Consistency is the key to happy microgreens.
- Create a Mini Greenhouse:Cover your container with a plastic lid or tray to create a cosy microgreen haven. This helps maintain a humid environment, perfect for germination.
- Wait for Sprouts:In a few days, you’ll see tiny green shoots emerging. Once they appear, remove the cover and let your microgreens soak in the light.
- Light Source Tips:If natural light is limited, consider using a simple LED grow light. Place it a few inches above your microgreens, and watch them thrive.
- Harvesting Happiness:When your microgreens are a few inches tall (usually in 7-14 days), it’s harvest time! Grab some clean scissors and snip them just above the growing medium.
Timing is Everything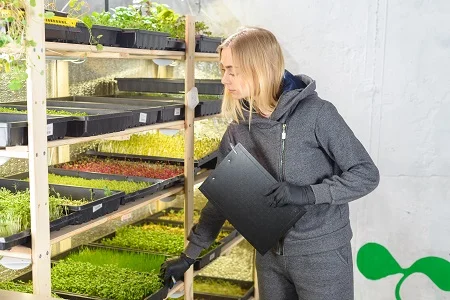
The cool thing about microgreens? They’re like the speedsters of the plant world – they grow super-fast! Let’s dive into the timeline of your microgreen journey, from seed to plate, and discover just how quick and rewarding it can be.
Simple Steps:
- Seed to Sprout:Microgreens are like little green sprinters. They start from seeds; before you know it, tiny shoots pop up, ready to dazzle your taste buds.
- Quick Growth Magic:The beauty of microgreens lies in their speedy growth. Within a week or two, you’ll witness your microgreens transforming from seeds into lush, flavorful greens.
- Harvest Happiness:Here’s the exciting part – your microgreens are ready for harvest! In just 7 to 14 days, depending on the type of microgreen, they’ll be at the perfect height for snipping and adding to your favourite dishes.
How to Grow Your Own Microgreens
Growing microgreens is a joyful and straightforward adventure, and we’re here to guide you every step of the way. Whether you’re opting for jars, trays, paper towels, or soil, we’ve got the ultimate microgreen growing guide tailored just for you.
Growing Microgreens in Jars: 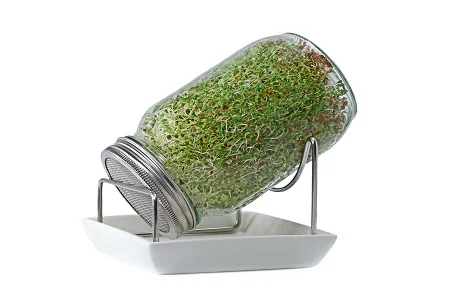
- Choose Your Seeds: Pick your favourite microgreen seeds.
- Prepare the Jar: Soak seeds in water overnight. Drain and spread them evenly in a clean jar.
- Rinse and Drain: Rinse seeds twice a day and drain excess water.
- Watch Them Grow: Place the jar in a well-lit spot and watch your microgreens flourish.
Growing Microgreens in Trays:
- Select Seeds: Choose microgreen seeds suited for tray growing.
- Prepare the Tray: Fill a shallow tray with a soilless medium or soil.
- Sow Seeds: Sprinkle seeds evenly on the surface. Press them down gently.
- Watering Routine: Keep the soil consistently moist, not soggy.
- Light and Harvest: Place the tray in a sunny spot, use artificial light if needed, and harvest when the microgreens reach the desired height.
Growing Microgreens on Paper Towel: 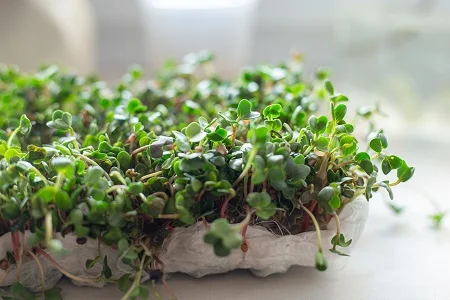
- Seed Selection: Pick seeds that are ideal for paper towel germination.
- Dampen Paper Towel: Moisten a paper towel and place it in a tray or dish.
- Seed Placement: Spread seeds evenly on the paper towel.
- Cover and Germinate: Cover the seeds with another damp paper towel, creating a mini greenhouse. Once germinated, remove the cover and place it in the light.
Growing Microgreens for Profit: A Green Business Venture 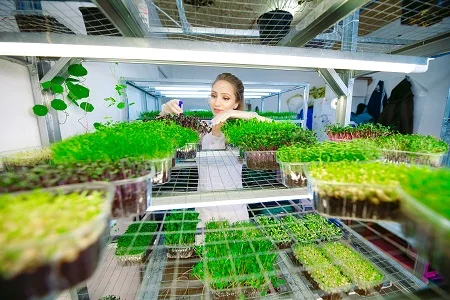
Turning your microgreen hobby into a profitable venture is an exciting journey. Whether you’re looking to start a small side hustle or dream of a thriving microgreen business, here’s a guide to help you grow microgreens for profit.
Market Research:
- Identify Your Niche: Explore local markets, restaurants, and health food stores to understand the demand for microgreens in your area.
- Target Customers: Determine your target customers, whether they’re chefs, health-conscious individuals, or local markets.
Select Profitable Varieties:
- Research High-Demand Microgreens: Identify microgreens that are popular and in demand, such as sunflowers, pea shoots, or radishes.
- Consider Specialty Varieties: Explore unique or speciality microgreens that can set your business apart.
Quality Matters:
- Invest in Quality Seeds: Source high-quality seeds to ensure robust and flavorful microgreens.
- Optimize Growing Conditions: Create optimal growing conditions, focusing on factors like light, water, and temperature, to produce top-notch microgreens.
Efficient Growing Methods:
- Choose Space-Efficient Systems: Opt for growing methods that maximize space, such as vertical farming or tiered racks.
- Implement Hydroponics: Consider hydroponic systems for efficient water use and faster growth.
Pricing Strategy:
- Determine Cost of Production: Calculate your production costs, including seeds, soil, utilities, and labour.
- Competitive Pricing: Research local market prices and set competitive yet profitable rates.
The Bottom Line
Growing microgreens is not just a skill; it’s a journey of nurturing and harvesting miniature wonders of nutrition. Whether you’re a beginner or a seasoned gardener, this guide equips you with the knowledge to grow your microgreens successfully.
Ready to embark on your microgreen adventure? Let’s sow the seeds and watch your home garden flourish with these nutrient-packed greens!


